A few weeks ago I stumbled on the Instagram account @mudpaint. I’m not even sure how I got there, isn’t that the crazy web that Instagram weaves!? One follow leads to suggested users and clicking on hashtags and suddenly your liking a picture of a cat from a guy in Norway. Anyways, I ended up checking out Mud Paint and was so excited to see their beautiful transformation pictures and was almost giddy when reading about their claim for better coverage and smoother finish than other furniture paint on the market. I needed to get my hands on this paint! So graciously they sent some from sunny California to pretty sunny (not as warm) Calgary, Canada. As soon as my hubby got home I dusted off an old piano bench that I picked up from GoodWill a couple weeks ago and got to work!
I gave the top a light sanding as they suggest, but l et’s be honest, other peoples gunk freaks me out, especially when there’s crusty, old, stuck on gunk…. i just can’t handle it! I guess the quicker option would be to wash it off but I just feel better hiding behind a sanding sponge, and it’s the best way to prep your piece so it works out! So, I gave it a quick sand and THEN I wiped it down.
Here’s where I got a little excited. The whole concept of just one coat on a piece of furniture kinda threw me for a loop. I guess subconsciously I put on quite the thick layer. It went on great and let me tell you the coverage was shocking. Really just one coat gave amazing coverage, just like they claim. I did touch up some brush strokes and likely didn’t wait the appropriate dry time. Here’s a pic after the one and only coat plus a couple touch ups – as you can see I hadn’t even painted the bottom of the legs yet, I was that excited about the coverage.

To my surprise – and let me be real – delight – as the piece began to dry the paint began to crackle. This was super exciting to me, but also had me curious as to why, I didn’t expect it… thankfully it works for this piece, but I don’t think it was supposed to happen. So I just carried on and went onto distressing and finishing the piece.

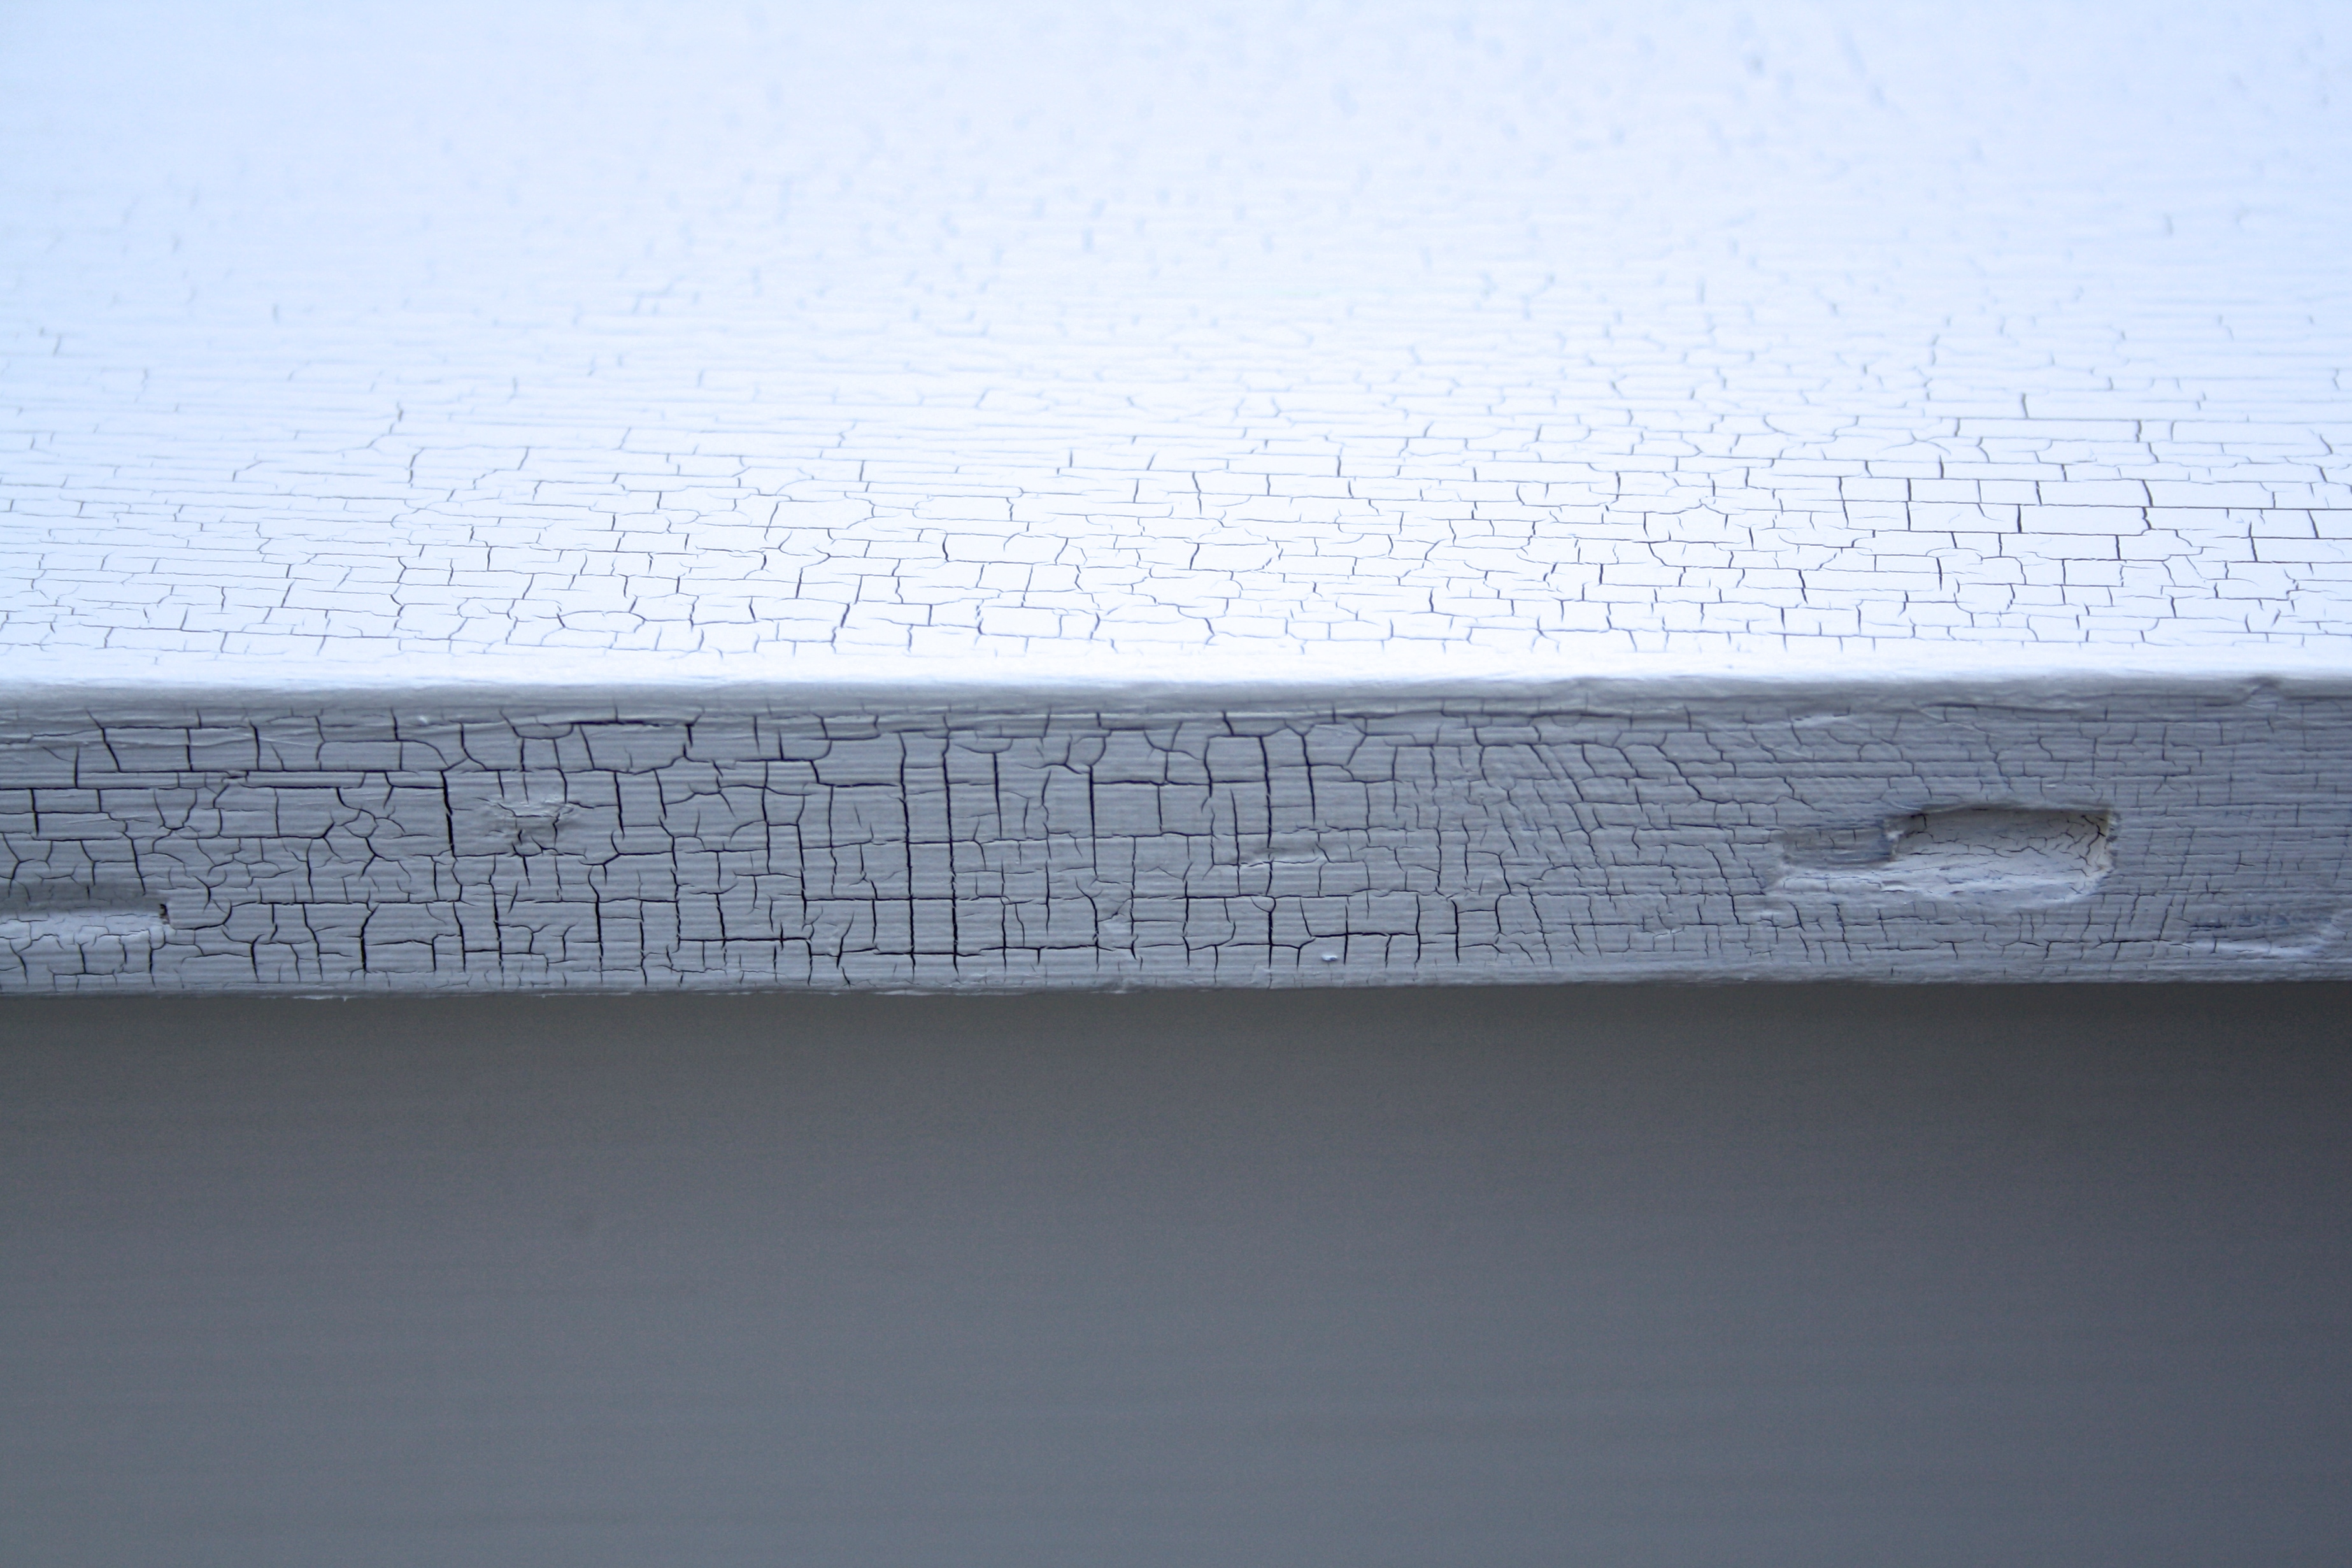
Even before I began to distress the piece I noticed the smooth finish. It wasn’t the same chalky, matte finish that most chalk paints have, this was smooth and only made smoother with my handy dandy sanding sponge! Distressing was a dream.

Wh o doesn’t love a pop of colour? I love a good ol’ drawer or compartment to sneak a little colour into a classic piece. I painted the inside of the piano bench with some homemade chalk paint – a go to when I’ve found a pretty colour of flat paint in the clearance section of the paint store!
I have been in touch with the sweet people who sent me this glorious MudPaint to see if they had any idea of why we got this beautiful crackle and I’m pretty sure that it has a lot to do with my eager beaver thick coat of paint I put on the piece. A quick solution would be to lightly sand and reapply a thinner coat, but I decided to leave the crackles on this piece! I have a piece lined up to give another go with a more of a conservative coat planned. I’ll keep you all posted on what becomes of that!
Long story short….ish…. I’m super happy with this paint! I wasn’t sure if I could believe all the claims, but the coverage – amazeballs, and the finish – smooth as butter! The customer service has been great too! Thanks so much MudPaint, I can’t wait to get my hands on Charcoal Black next!!!


I love your idea to paint the inside a different color. It looks fabulous!
It looks so pretty! I’m glad your happy little accident happened because the crackling totally works with this piece!